A Return to Painting
I love to paint. However, there always seems to be an obstacle in my way preventing me from expressing my creativity in this way. I didn't paint from the time I graduated high school until nearly eight years later. When I was in college I didn't have time. When I had my son I was too tired. Then I went to work, then school again. Excuses, excuses. I finally got up the nerve to paint a couple years ago. One of my best friends likes to hike a lot and takes beautiful photographs of the trails and waterfalls along the way. I had to paint them! So, with his permission, I grabbed my paint and brushes and got to work. All of the paintings were done in acrylic and painted in the late hours of the night to the wee hours of the morning as that is the only time I can paint uninterrupted.
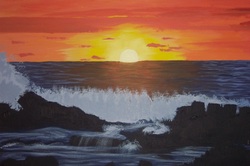
The first painting after my long hiatus from the art world was a seascape of Buffalo Bay, South Africa. It was a Christmas gift for my Dad.
The first painting after my long hiatus from the art world was a seascape of Buffalo Bay, South Africa. It was a Christmas gift for my Dad.
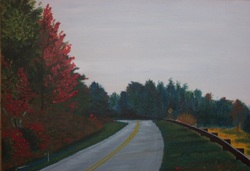
Next was a gift for my Mom--a scene from Blue Ridge Parkway, Interstate 26 to Great Smoky Mountains National Park.
For my nephew I painted this cool scene from the Appalachian Trail.
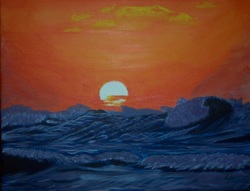
My friend, the one who took all these beautiful photographs, was getting married and I thought it would be nice to paint them a picture as a wedding gift. I painted their favorite picture--a sunrise over Buffalo Bay, South Africa.
I had so much fun painting all of these pictures. Unfortunately more excuses have crept up over time and I have two unfinished paintings in my room, begging to be completed. Hopefully after the holidays I will be able to devote more time to one of my favorite, but often neglected hobbies.
 RSS Feed